You know I love Interactive Read Alouds, right?! They’re one of my favorite activities to do in the classroom because of the conversations we have and ALL of the skills my students are practicing. Check out this blog post HERE to read all of the reasons why you need to be doing them. Anyway, I wanted to write a post about HOW to do them. I want to back up and give you the basics of what an Interactive Read Aloud looks like and some tips to make them successful. Keep reading to learn more about my favorite, essential activity in any classroom.
You should be reading aloud to your students EVERY DAY! Now, I know sometimes that’s not always possible, but it should be a priority. An interactive read aloud is a purposeful and engaging read aloud time. Gone are the days where the teacher reads and the students just sit and listen. Your students should be interacting with the text and with each other. They’re going to get the most out of an interactive read loud when they are, you guessed it, INTERACTING!
I’m going to give you a 4-step process for how to do interactive read alouds.
1. Pick a book and plan the IRA.
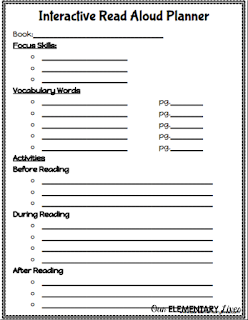
Picking your book and planning the IRA can be the hard, not so fun part. You MUST plan before you do an IRA with your class. It will not be purposeful if you do not plan. You cannot just wing an Interactive Read Aloud and expect it to be exactly what you want, believe me, I’ve tried and it’s just a hot mess. In a previous post called How to Plan an IRA in 5 Easy Steps, I tell you everything you need to know about planning an IRA including tips for picking focus skills and vocabulary and some activities you can do before, during and after you read the book. I also give you an IRA Planner as a freebie, so go check it out. I use it for every IRA I plan.
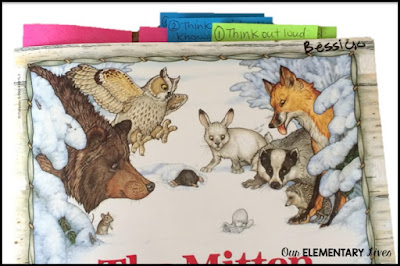
As I plan, I will also make notes on sticky notes so I can just stick them in the book where I want to stop. It makes it easy for me so I don’t have to remember exactly where to stop. The sticky note tells me where to stop and what I want to do when I stop. (All of my IRA resources in my TpT store include sticky note printables and print and cut notes that make it easy to know where to stop and interact. Who doesn’t love printing on sticky notes?!)
A couple of other ideas about picking your book and planning: make sure it’s a book you love and make sure that when you read it, you enjoy listening to the book too. Picking books with strong word choice, rhythms or rhymes are more fun to read. Pick a book at your students’ listening level. It shouldn’t be at their reading level. You’re practicing comprehension here so you want them to have more of a challenge than books they can read on their own.
Once this is over, the fun can begin!
2. Gather your class and read the book!
- They can sit at their desks or on the floor. When my only read aloud time was during our milk break, we did it at our desks, I was desperate to fit it in. I would definitely suggest though, doing it in your whole group area, like on your carpet. This is a lot more intimate and easier to interact with the whole group.
- Teach the expectations from day one. This includes how to turn and talk, what you expect when it’s time to stop and jot/draw, act it out or respond as a class. Here is a great freebie that I use for teaching how to turn and talk. It stays on my whiteboard all year and we review it often.
- Have them sit next to an assigned partner. I use our literacy partners. That way they are comfortable as a reader with that person and it’s someone they have been working with for a bit. They can then make connections to previous texts or work they have done together as reading partners. It also saves from the hassle of telling them to turn and talk and taking the time to find a partner, oh and that kid doesn’t have a partner, and there’s a group of 4, (WHAT?!?!), and someone feels left out, the list goes on and on. You know it happens and it stresses me out. Don’t let that happen to you, we have enough stress in our life. :o)
- If you have a stop and jot or draw have them bring the sticky notes and pencils to the carpet before you start or you can use an iPad with an app like Doodle Buddy. That way when it’s time to stop and jot/draw they’re ready to go and you don’t have to take precious reading time to get the materials.
- Talking and interacting with the text is the most important part! That’s why most of my think alouds and stopping points involve turn and talks. Don’t feel though that you need to discuss as a class or have someone answer for every turn and talk. The whole idea of the turn and talk is for everyone to share what they think and by allowing them to turn and talk and not just calling on kids who raise their hand, everyone is practicing these vital oral language skills.
- If you have ELL or SPED students or anyone who doesn’t really share their thoughts, put them in a group of three. The reason they don’t feel comfortable sharing may be because they don’t have the language skills to do so and by putting them in a group of three you are providing them with great talking role models who can hopefully support a partner who is just learning the language or skills. You also wouldn’t want one child to always do the talking so having a group of three allows for the role model peer to have someone to discuss the story with too.
When you are doing the read aloud, you will want to make sure you have activities planned for before, during and after the read. I go into more details in THIS post. Some things you can do before reading include predicting and building background knowledge. During the reading, you can identify key story elements, make connections, and teach vocabulary. After the read aloud, I typically do a retelling of the story but you can also discuss the lesson learned or check predictions. I also sometimes like to do story elements, retelling, or connecting worksheets too. Depends on if I have the time and if I want an assessment of what was read.
3. Decide if you will read it again.
Most times I like to read the book again. In my second read, I typically focus more on common core standards like identifying key story elements or details. When you read a book a second time the students know what happens and can focus more on these skills. This read typically doesn’t take as long.
I also don’t always do it the next day. Sometimes I’ll go up to a week or more between readings. If you don’t want to read it a second time that’s fine too.
I will usually put the book out on our shared bookshelf so the kids can pick it up and read it or look at it if they want. They love reading through them and reading them like I do. It’s fun to watch them play teacher.
4. Do it all over again!
Once you’re done, pick another book and start again. I hope this will soon become your favorite part of your day too. The kids love it, you love it, it’s a win-win. It really is such an important activity to do with your students and teaches so many important skills at once that it’s silly not to do it as much as you can.
So that’s all I have for now. I hope you found this post useful in your endeavor to learn more about Interactive Read Alouds. Let me know in the comments if you have any tips or suggestions for doing IRAs. I’d love to hear how they go in your classroom.

If you’re interested in one of my Interactive Read Aloud resources, click HERE or check out this bundle!

More about interactive read alouds
Check out these other blog posts all about interactive read alouds
- 3 reasons why you need to be doing interactive read alouds
- The best tips for interactive read alouds
- 3 ways to prepare for an interactive read aloud
- How to print on sticky notes
Or check out >>THIS<< blog post!
That is it for today. These were some tips for how to do an interactive read aloud. I hope you found them helpful. Please comment or email me at [email protected] if you have anything to share!